Skip to Content

Onion Chive Biscuits

January 6, 2024

These onion chive biscuits aren’t just for breakfast. They’re delicious on their own with a big pat of butter, with all your favorite breakfast fixings, or for dipping into soups and stews.

Categories

  • Spring
  • Breakfast
  • Brunch
  • Appetizers
homemade onion chive biscuits being buttered on a plate
Photography by Gayle McLeod

More of our best biscuits to try.

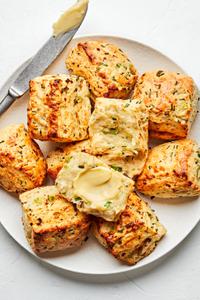
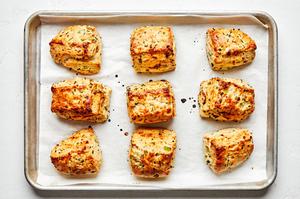
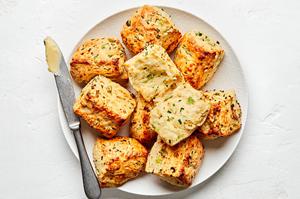
The Fluffiest Onion Chive Biscuits

Our onion chive biscuits are perfect any time of day. We like them with our Sausage Gravy for breakfast or on the side of Poached Eggs. Add Soft-Scrambled Eggs and make it an onion and chive biscuit sandwich! Or serve these for dinner with our Beef Stew, Short Ribs or Wine Braised Beef. They’re really good with soups or stews.

flour, baking powder, baking soda, salt, and minced onion, butter, Parmesan, buttermilk chives & green onions in prep bowls

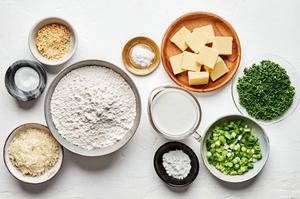
Ingredients You’ll Need To Make Easy Onion And Chive Biscuits

  • All-purpose flour

  • Baking powder

  • Baking soda

  • Sea salt

  • Dried minced onion (optional)

  • Cold unsalted butter, sliced

  • Freshly grated Parmesan cheese

  • Cold buttermilk, plus more for brushing

  • Chopped chives

  • Chopped green onions

flour, baking powder, baking soda, salt, minced onion and butter being pulsed in a food processor
flour, baking powder, baking soda, salt, minced onion, butter and buttermilk pulsed in a food processor
onion chive biscuit dough rolled out on the counter
onion chive biscuit dough rolled out and folded on the counter

How to Make Tender Onion Chive Biscuits

  1. Preheat the oven to 450°F + line a rimmed sheet pan with parchment paper.

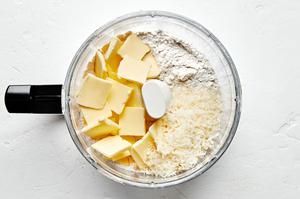
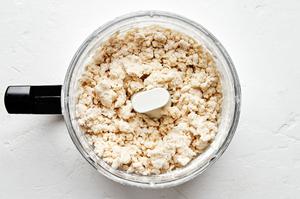
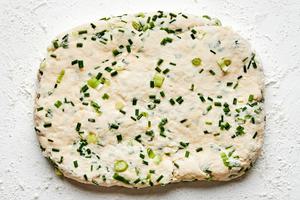
  2. Make the dough. We use a food processor, but hands will work too. See our notes below.

  3. Mix in the chives and green onions.

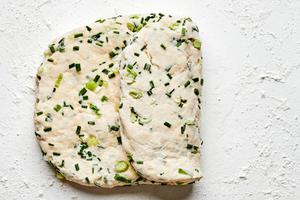
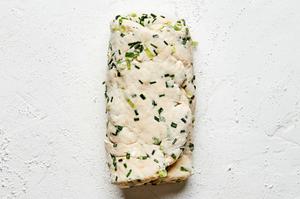
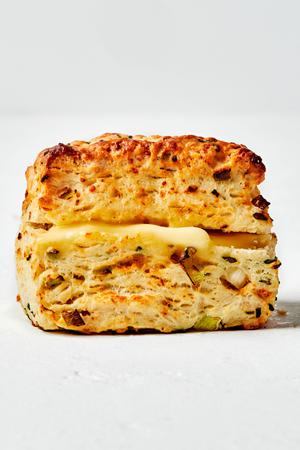
  4. Fold the dough. This gives your biscuits layers so they’re nice and fluffy.

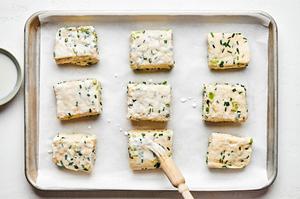
  5. Cut the biscuits. You can use a biscuit cutter or a sharp knife.

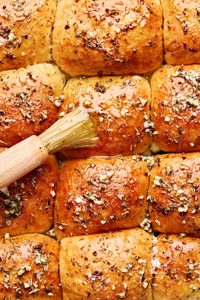
  6. Bake the biscuits until golden brown. Arrange biscuits on the prepared sheet pan and brush with buttermilk. Bake for 18-20 minutes, or until golden brown.

onion chive biscuit dough rolled out and folded into thirds on the counter
onion chive biscuit dough cut into 9 pieces on a parchment lined baking sheet being brushed with buttermilk
9 homemade onion chive biscuits on a parchment lined baking sheet
homemade onion chive biscuits being buttered on a plate

How to Store Biscuits + Tips

  • If they make it past day two at room temperature, store biscuits in an air-tight container. They’ll last up to a week in the fridge, or up to three months in the freezer.

  • If you don’t have a food processor, use your hands to mix the dough! When adding the butter you’ll want to pinch the mixture until you get the same pea-size crumbles or use a pastry cutter to cut in the butter. Just remember that your hands are much warmer than a food processor, so keep an eye out that your butter doesn't soften too much.

  • The secret to perfect biscuits? You don’t want to overwork the dough. Starting with really cold butter and cream will also help your biscuits become tender and fluffy when they’re baked.

  • Buttermilk really is best for this recipe. If you have to skip the buttermilk, you can make your own using whole milk and lemon juice or vinegar, but it won’t be quite the same as buttermilk.

a homemade fluffy onion chive biscuit on the counter

A Few More of Our Favorite Breads

Bake A Batch, Show Some Love

For more recipe inspiration, follow us on Facebook, Instagram, TikTok and Pinterest or order our cookbook. We love when you share your meals. Tag us on Instagram using #themodernproper. Happy cooking!

💌 Let's Stay Together

There are so many great ways to receive all of our latest recipes, meal tips, and inspiration.

Onion Chive Biscuits

  • Serves: 9
  • Yields: 9 Biscuits
  • Prep Time:  25 min
  • Cook Time:  20 min

Ingredients

  • 2½ cups all-purpose flour, plus more for dusting
  • 1 tablespoon baking powder
  • ½ teaspoon baking soda
  • 1½ teaspoons sea salt
  • 2 tablespoons dried minced onion (optional)
  • 10 tablespoons cold unsalted butter, sliced
  • ½ cup freshly grated Parmesan cheese
  • 1 cup cold buttermilk, plus more for brushing
  • ½ cup chopped chives
  • ½ cup chopped green onions

Method

  1. Preheat the oven to 450°F with a rack in the center position. Line a rimmed sheet pan with parchment paper.

  2. To a food processor, add the flour, baking powder, baking soda, salt, and minced onion if using. Pulse 2 to 3 times until combined. Add the butter and Parmesan and pulse until pea-sized crumbles form. Add the buttermilk and pulse 8 times, or until a shaggy dough forms.

  3. Remove the dough from the food processor and place on a lightly floured surface. Using your hands, mix the chives and green onions into the dough until just combined and the dough is a little less sticky.

  4. Using your hands press the dough into a rectangle, about 1-inch thick. Fold the rectangle into thirds and press into a 1-inch thick rectangle. Repeat folding and pressing 3 more times. Using a 2½- inch biscuit cutter, cut out 8 dough rounds or use a sharp knife to cut 9 dough squares. Gather any dough scraps and pat into a 1-inch-thick dough round. (You should have 9 rounds or squares.)

  5. Arrange biscuits on the prepared sheet pan and brush with buttermilk. Bake for 18-20 minutes, or until golden brown. Let cool slightly before serving


Note: If you don’t have a food processor, use your hands to mix the dough! When adding the butter you’ll want to pinch the mixture until you get the same pea-size crumbles or use a pastry cutter to cut in the butter. Just remember that your hands are much warmer than a food processor so keep an eye out that your butter doesn't soften too much ! You don’t want to overwork the dough.

Nutrition Info

  • Per Serving
  • Amount
  • Calories268
  • Protein6 g
  • Carbohydrates28 g
  • Total Fat14 g
  • Dietary Fiber1 g
  • Cholesterol38 mg
  • sodium747 mg
  • Total Sugars1 g

Onion Chive Biscuits

Questions & Reviews

Join the discussion below.

or
  • Leanne

    Making all your recipes for thanksgiving:) would these be good if made ahead of time? Or would I be able to throw them in while doing the spatchcock Turkey ? Thanks !

    You could throw them in when the turkey comes out or bake them ahead of time would work great as well!

  • kay

    Yes, make these. They were fantastic.

    Thanks Kay!