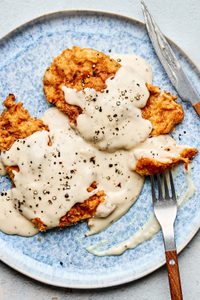
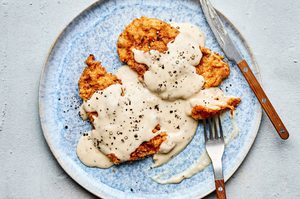
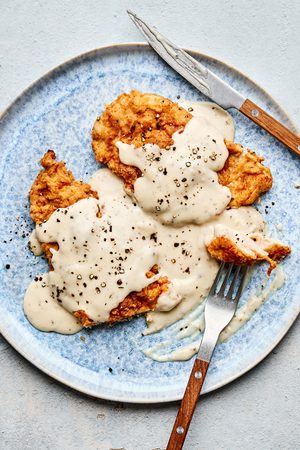
There are two things that make chicken-fried chicken great; crispy fried outer crust, and homemade creamy country gravy on top. From crispy fried chicken sandwiches, to weeknight-friendly panko chicken, I make a lot of fried chicken, but this classic down-home chicken-fried chicken is the ultimate. I developed this recipe with my friend Gabe Rucker, who is a fantastic chef, because I really wanted to nail it.
Why This Recipe Works
- Double-dredging the cutlets means the crispy chicken-fried chicken coating won’t fall off.
- Pounding the chicken breast cutlets help them fry evenly so they’re perfectly juicy and never over-cooked.
- An easy, creamy gravy recipe makes it restaurant-level good.

How To Make Chicken-Fried Chicken
A step by step summary. For the full, detailed instructions, check out the recipe card at the bottom of this post.
- Prep the chicken breasts. Cut them in half to make two thin cutlets, then pound them to an even thickness.
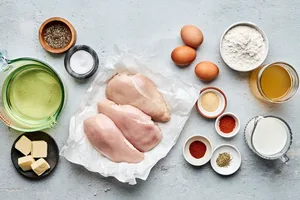
- Make dredging stations. One dry (flour and spices) and one wet (beaten eggs). I like to use pie pans, but shallow bowls work, too.
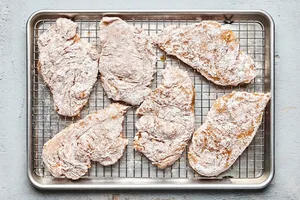
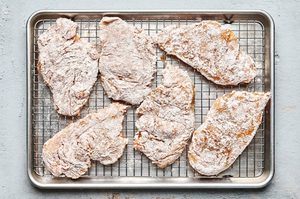
- Dip the chicken cutlets in egg, then press both sides of the chicken into the spice-flour mixture.
- Let the coating set for about 15 minutes. This is KEY!
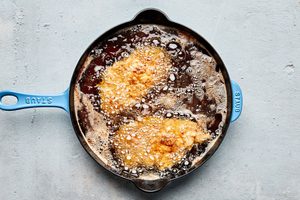
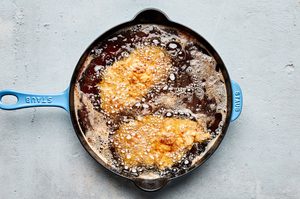
- Fry the chicken. Fry the breaded cutlets in an inch of hot oil (325°F - 350°F) two at a time, allowing about 4 minutes per side.

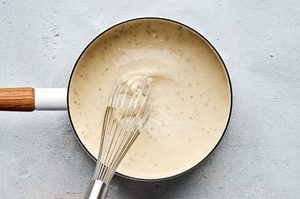
How To Make Country Gravy
- Melt butter over low heat.
- Whisk flour and stock together until you have a smooth mixture.
- Whisk the flour-stock mixture into the melted butter.
- Slowly whisk in more stock, milk, and seasonings.
- Gently simmer, stirring constantly, until the gravy has thickened.

Variations & Swaps
- Make this chicken a little spicy, by adding extra cayenne, black pepper or hot sauce to the gravy.
- Add grated Parmesan to the crispy coating for extra flavor.
- Use chicken thighs instead of breasts: Boneless, skinless thighs work great and are often more flavorful and juicy than breasts. Just make sure to pound them to an even thickness.
Tips For Great Chicken-Fried Chicken
- Make the gravy ahead of time! To make dinner even quicker, you can make the gravy ahead of time and store it in the refrigerator for up to 4 days. Warm it over low heat, whisking vigorously. Add a small pour of milk if needed.
- Pound the chicken cutlets because consistent thickness ensures even cooking.
- Make sure your oil is at the perfect temperature for frying by using a thermometer to check for an oil temp of 350°F.
- If you do not have a thermometer, you can check the oil temperature by dropping a small piece of breading into the oil. It should sizzle immediately and float to the top. If it burns fast, the oil is too hot. If there’s no sizzle, the oil may not be hot enough yet. Increase the heat slowly. If the oil begins to smoke, crank the heat down.
- To ensure that every piece of chicken-fried chicken is crispy, take care to bring the frying oil back up to temperature between batches.
- Let the breaded, uncooked chicken rest for 15 minutes before frying. This gives the coating time to adhere to the chicken and helps it stick when frying.
What To Serve With Chicken-Fried Chicken
I generally think of this meal as an indulgent treat, which means you can go two ways with the sides to serve it with! You can serve it with something light, like salad, or you can go for broke and serve chicken-fried chicken with more Southern favorites, like:

How To Store & Reheat Leftovers
Chicken-fried chicken is best enjoyed fresh, but leftovers keep fine in the fridge for up to 3 days. Be sure to store the fried chicken and gravy separately. I suggest reheating leftovers in the oven: 350°F for 10-15 minutes on a wire rack. You could also reheat the chicken in an air fryer set to 375°F for 3-5 minutes. Don’t microwave the leftovers! It makes the crispy coating soggy.
More Crispy Chicken Recipes

More Comfort Food Recipes
For more recipe inspiration, follow us on Facebook, Instagram, TikTok and Pinterest or order our cookbook. We love when you share your meals. Tag us on Instagram using #themodernproper, and we’d love to hear what you think of this recipe in the comments below. Happy cooking!