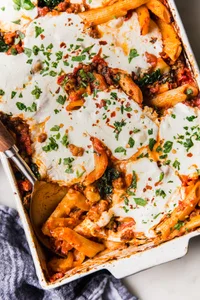
The Best, Easy Baked Rigatoni
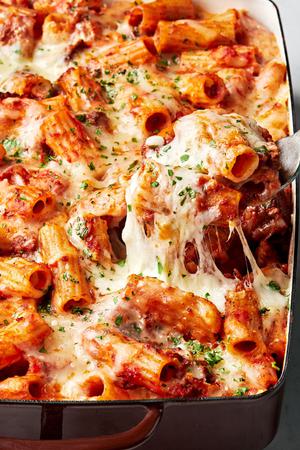
Baked rigatoni is such a hit every time! Perfectly tender noodles baked with bites of sausage and beef, onions and garlic, plus lots of sauce and cheese?! Who would say no to that? If you love hearty, Italian pasta bakes like my easy baked rigatoni, try my baked tortellini, baked ziti, baked ravioli, chicken tetrazzini, manicotti or easy stuffed shells, too!
I love baked rigatoni so much because it’s a recipe that feeds a lot of people, is budget friendly, kid-friendly, and freezer friendly, too. Read on for swaps and tips for making it ahead of time.

How to Make Baked Rigatoni
See the full recipe card below for more detailed instructions.
- Cook the pasta al dente! Don’t forget to salt the pasta water.
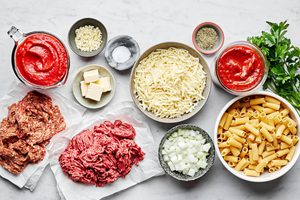
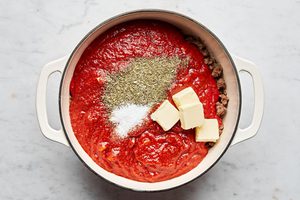
- Sauté! Brown the beef and sausage to create deep layers of flavor. Once browned, add the sauce and the remaining few ingredients.
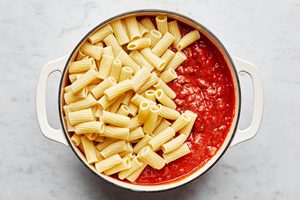
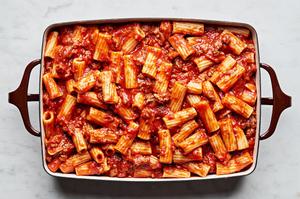
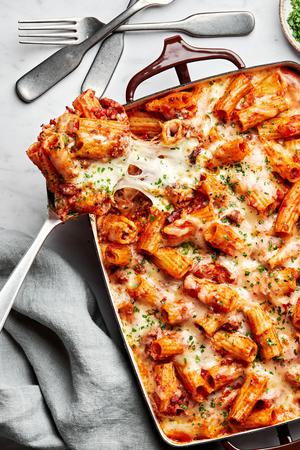
- Mix it all together! Make sure every rigatoni noodle is properly sauced.
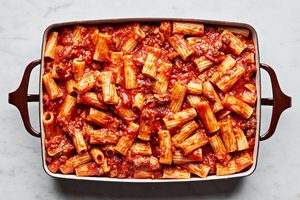
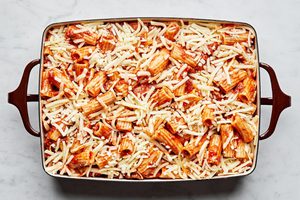
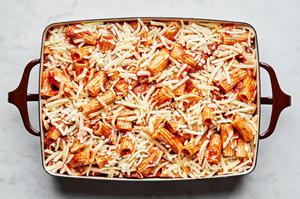
- Top with handfuls of mozzarella.
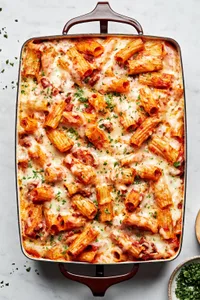
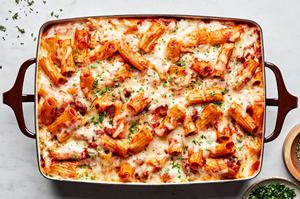
- Bake! Covered for the first 25 minutes then uncovered for 10-15.

Tips For Perfect Baked Pasta
- Cook the rigatoni pasta al dente according to the directions on the package. Al dente means that the pasta is almost fully cooked, but it still has a bite (dente) to it!
- The baked rigatoni cooks in the oven for 25 minutes covered, then 10-15 minutes, uncovered. This helps keep the moisture in and prevents drying out while still getting that golden brown cheesy crust we all love!
- One of my favorite tricks: Don’t drain the pasta completely. Leave just a little pasta water in the pasta. It’s starchy, so it helps everything come together.
- Use lots of sauce. It might look like too much but, I promise, when combined and baked, the pasta will cook a little more in the oven and suck up a little sauce!
- Make it vegetarian: Instead of meat, and add sautéed mushrooms, bell peppers, and zucchini for a hearty veggie version.

Make Ahead + Meal Prep Tips
- Assemble the dish completely up to 1 day ahead. Store it covered in the fridge until you’re ready to bake it.
- Make tomato sauce (if you’re using homemade sauce) up to 3 days ahead and store it in the fridge until you’re ready to use.
- Refrigerate any leftovers for up to 4 days.
How To Freeze Baked Rigatoni
Freeze the unbaked rigatoni dish for up to 3 months. Assemble it in a freezer-safe container, then wrap it tightly in plastic wrap and foil, and label with date. You can bake the rigatoni directly out of the freezer. Just set your oven to 350°F and bake for about 45-50 minutes until the pasta is warm and the cheese is bubbling. Or, you can freeze the baked rigatoni, fully cooked, for up to 2 months. To reheat, thaw it in the fridge overnight, then place it in a 350°F oven.
What To Serve With Baked Rigatoni
- Salad! Caesar Salad, Maple Roasted Squash Salad (perfect during the fall!), Antipasto Salad, or even a Simple Italian Salad.
- Garlic Bread to scoop up all that leftover sauce and cheese.
- Kids, and adults alike, will also go crazy over Homemade Mozzarella Sticks for a quick and easy appetizer.
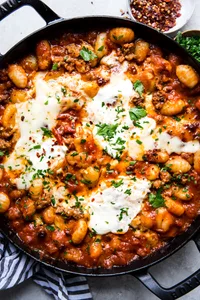
What Is The Difference Between Baked Ziti And Baked Rigatoni?
Rigatoni pasta noodles are medium sized pasta tubes with little ridges on the outside. Ziti noodles are longer, skinnier, and don’t have ridges. I like to use rigatoni because those little ridges help the pasta hold onto the sauce! You can always swap out ziti for rigatoni but make sure you check the cooking times. When it comes to baked ziti versus baked rigatoni, they’re roughly the same dish, just with a different noodle.
Our Favorite Baked Pasta Recipes
Pasta is the perfect, filling, inexpensive meal AND it gets even better when you can toss everything into a dish, and pop it in the oven… voilà! Here are our favorites – simple enough for a weeknight, impressive enough for a weekend dinner party:

Im-pasta-bley Delicious!
For more recipe inspiration, follow us on Facebook, Instagram, TikTok and Pinterest or order our cookbook. We love when you share your meals. Tag us on Instagram using #themodernproper, and we’d love to hear what you think of this recipe in the comments below. Happy cooking!